
1 Comments
Hero Arts September 2020 | 5 cards 1 kit
Fall is officially here and I figured what better way to celebrate than with a few Fall and Halloween cards! Today, I used contents from the Hero Arts September 2020 card kit to create 4 “ gourdeous" Fall cards and two “ spooktacular" Halloween cards. I love how versatile this month's Hero Arts kit is, not to mention the value this month is amazing! In this month’s kit you get a 6x8 layering stamp set, a 3x4 sentiment stamp set, some ink, coordinating dies and some beautiful glitter card stock in Autumn colors! Check out the video tutorial below to see exactly how I created each card. Below are some close up photos and more information regarding each card. Please let me know which one was your favorite! By the way, this video is also apart of my Halloween card series! Any guesses on todays movie reference? Find out in the video!
Click here to purchase a few cards from today's blog post!
Video Tutorial
Card One

This card was entirely stamped using the inks from the kit. I used the lemon drop, creamsicle and grape slush inks from the kit to ink blend the sky. To add dimension to the card, I popped up the inked panel onto a yellow matte with foam tape. The bow was created with some straw material from my stash, but you can substitute your bow with jute, ribbon or twine! I added a sentiment tag behind the bow. The "Happy Harvest" sentiment was stamped on a grape slush ink blended rectangle. This is a great way to coordinate your colors on your card in case you don't have an exact card stock color match!
Card Two

I enjoyed the added Halloween sentiments in this kit, so I decided to create this spooky black and white card. For the pumpkin patch, I only used the first 3 stamp layers. I stamped the first and third layer with versafine onyx black ink, and I heat embossed the second layer with silver embossing powder. I stamped the first layer of the wheat with black ink and the silver heat embossed the second layer. The sky was created with Black Soot distress oxide ink. To create the stars, I splattered my Gansai Kuretake Pearlescent Watercolor with a paintbrush. The moon was created with a circle punch mask! The card was finished off with a scattering of Trinity Stamps silver rhinestones. I love the spooky monochromatic look of this one!
Card Three

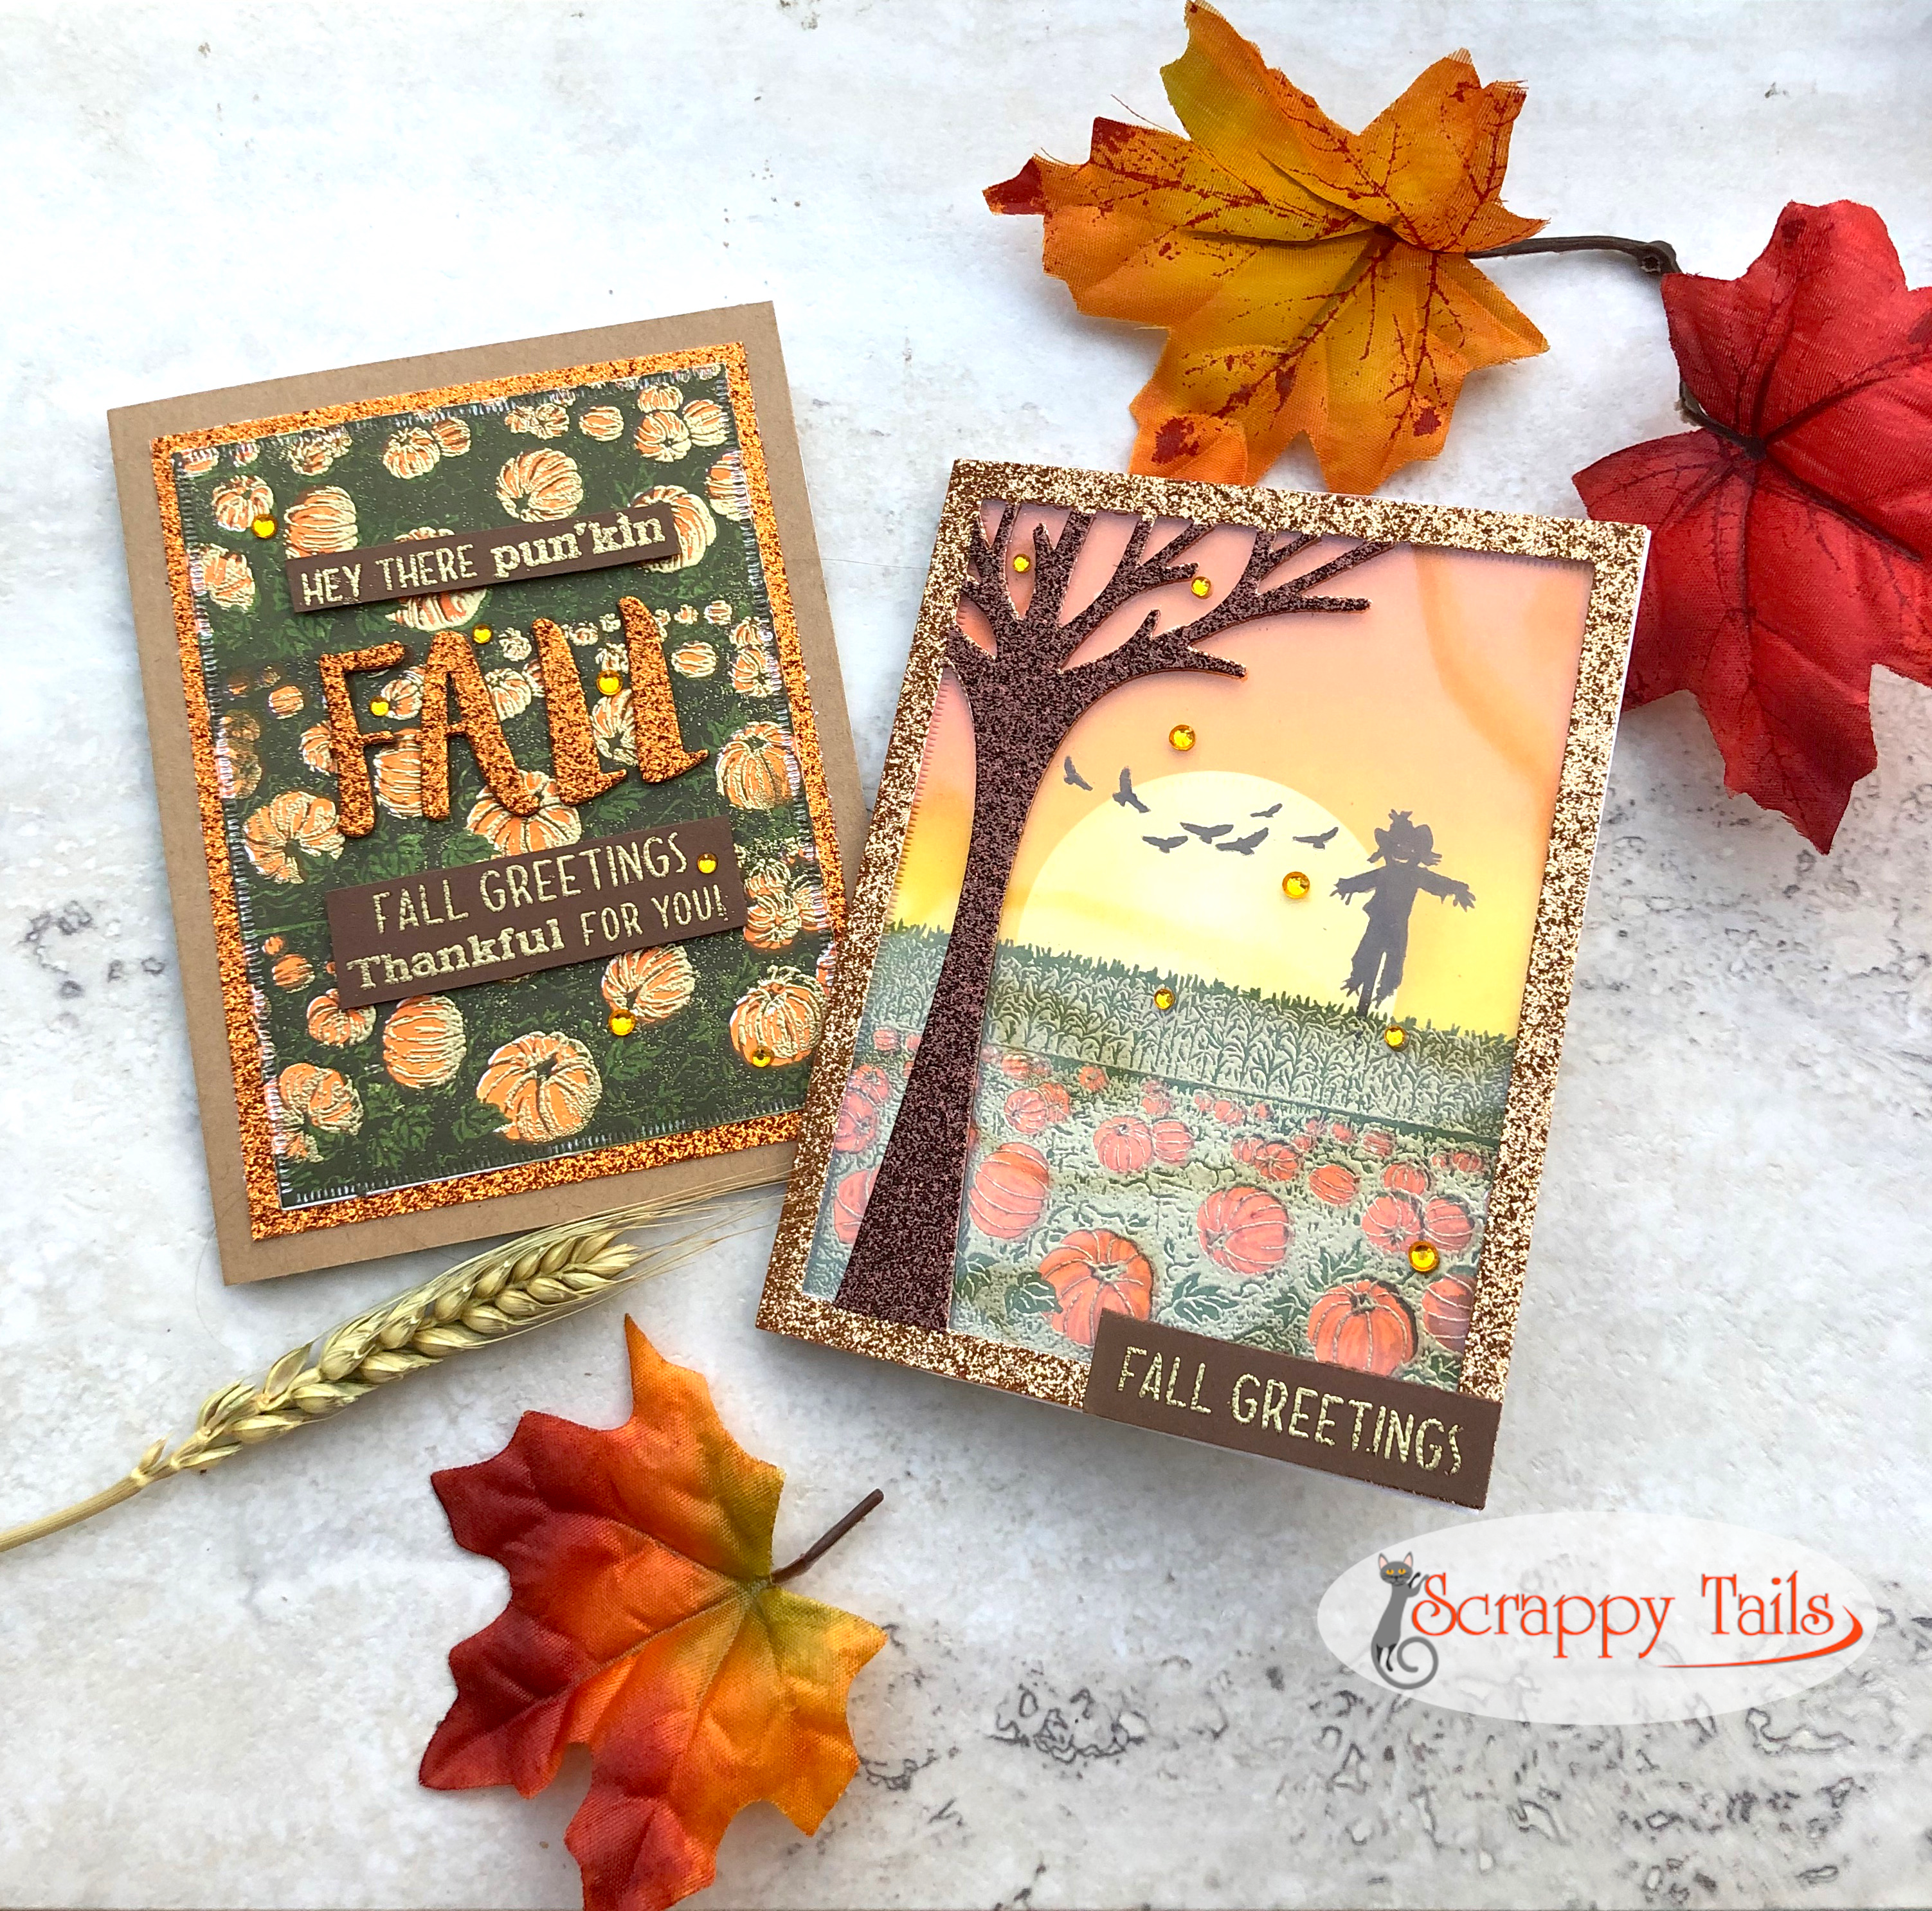
I loved how the silver embossing turned out in card two, so I decided to create another pumpkin patch, this time with gold embossing powder, to create a pretty Fall scene. This scene was entirely stamped with the inks from the kit. For the sky, I ink blended Lemon Drop, Creamsicle and Potters Clay by Memento ink. The sun was created with a half circle mask. The fourth layer of the pumpkin patch was inked with Memento Potters Clay. The rest of the layers were stamped with the "Moss" and "Creamsicle" ink from the kit. The second layer was gold heat embossed. I created the tree panel with a Lawn Fawn die called “Landscape Leafy Tree Backdrop”, which I die cut from two of the glitter papers from the kit.
Card Four

I challenged myself to make a non-scene card by creating this fun pattern paper, which was entirely made with the pumpkin patch layering stamps, and the inks from the kit. The fourth layer of the pumpkins were gold heat embossed to add some shine. The "Fall" word was created with some Echo Park “Lindsay Uppercase Alphabet” dies and the orange glitter paper from the kit. The same glitter paper is featured as a matte on this card to help everything coordinate. I gold embossed a couple sentiments from the 3x4 stamp set to create a cute Fall thinking of you sentiment. Tip, If you want your letter dies to stand out, layer a couple heavy weight white/black letters behind to add height and dimension! If this background is a little to busy for you, you can always add a layer of vellum on top of the pattern paper.
Card Five

We are onto my favorite card, a simple slimline landscape. The stamps are really easy to align side by side, I even did it on an acrylic block! Obviously, a Misti is super helpful for stamp layering, but you don't necessarily need a stamp platform to create stunning cards like this one. Again, I used all of the inks provided in the kit to create the pumpkin patch. The second layer in the wheat was stamped with "Potters Clay" ink. The sky was created with some blue ink and a Simon Says Stamp “Clouds for Days” stencil
Bonus Card

1 Comments
I absolutely love every one of your cards! But my favorite is the monochromatic black card. You are very talented!