
0 Comments
Not 2 Shabby "Tea Time Buddies" | 3 Cards 1 Stamp Set
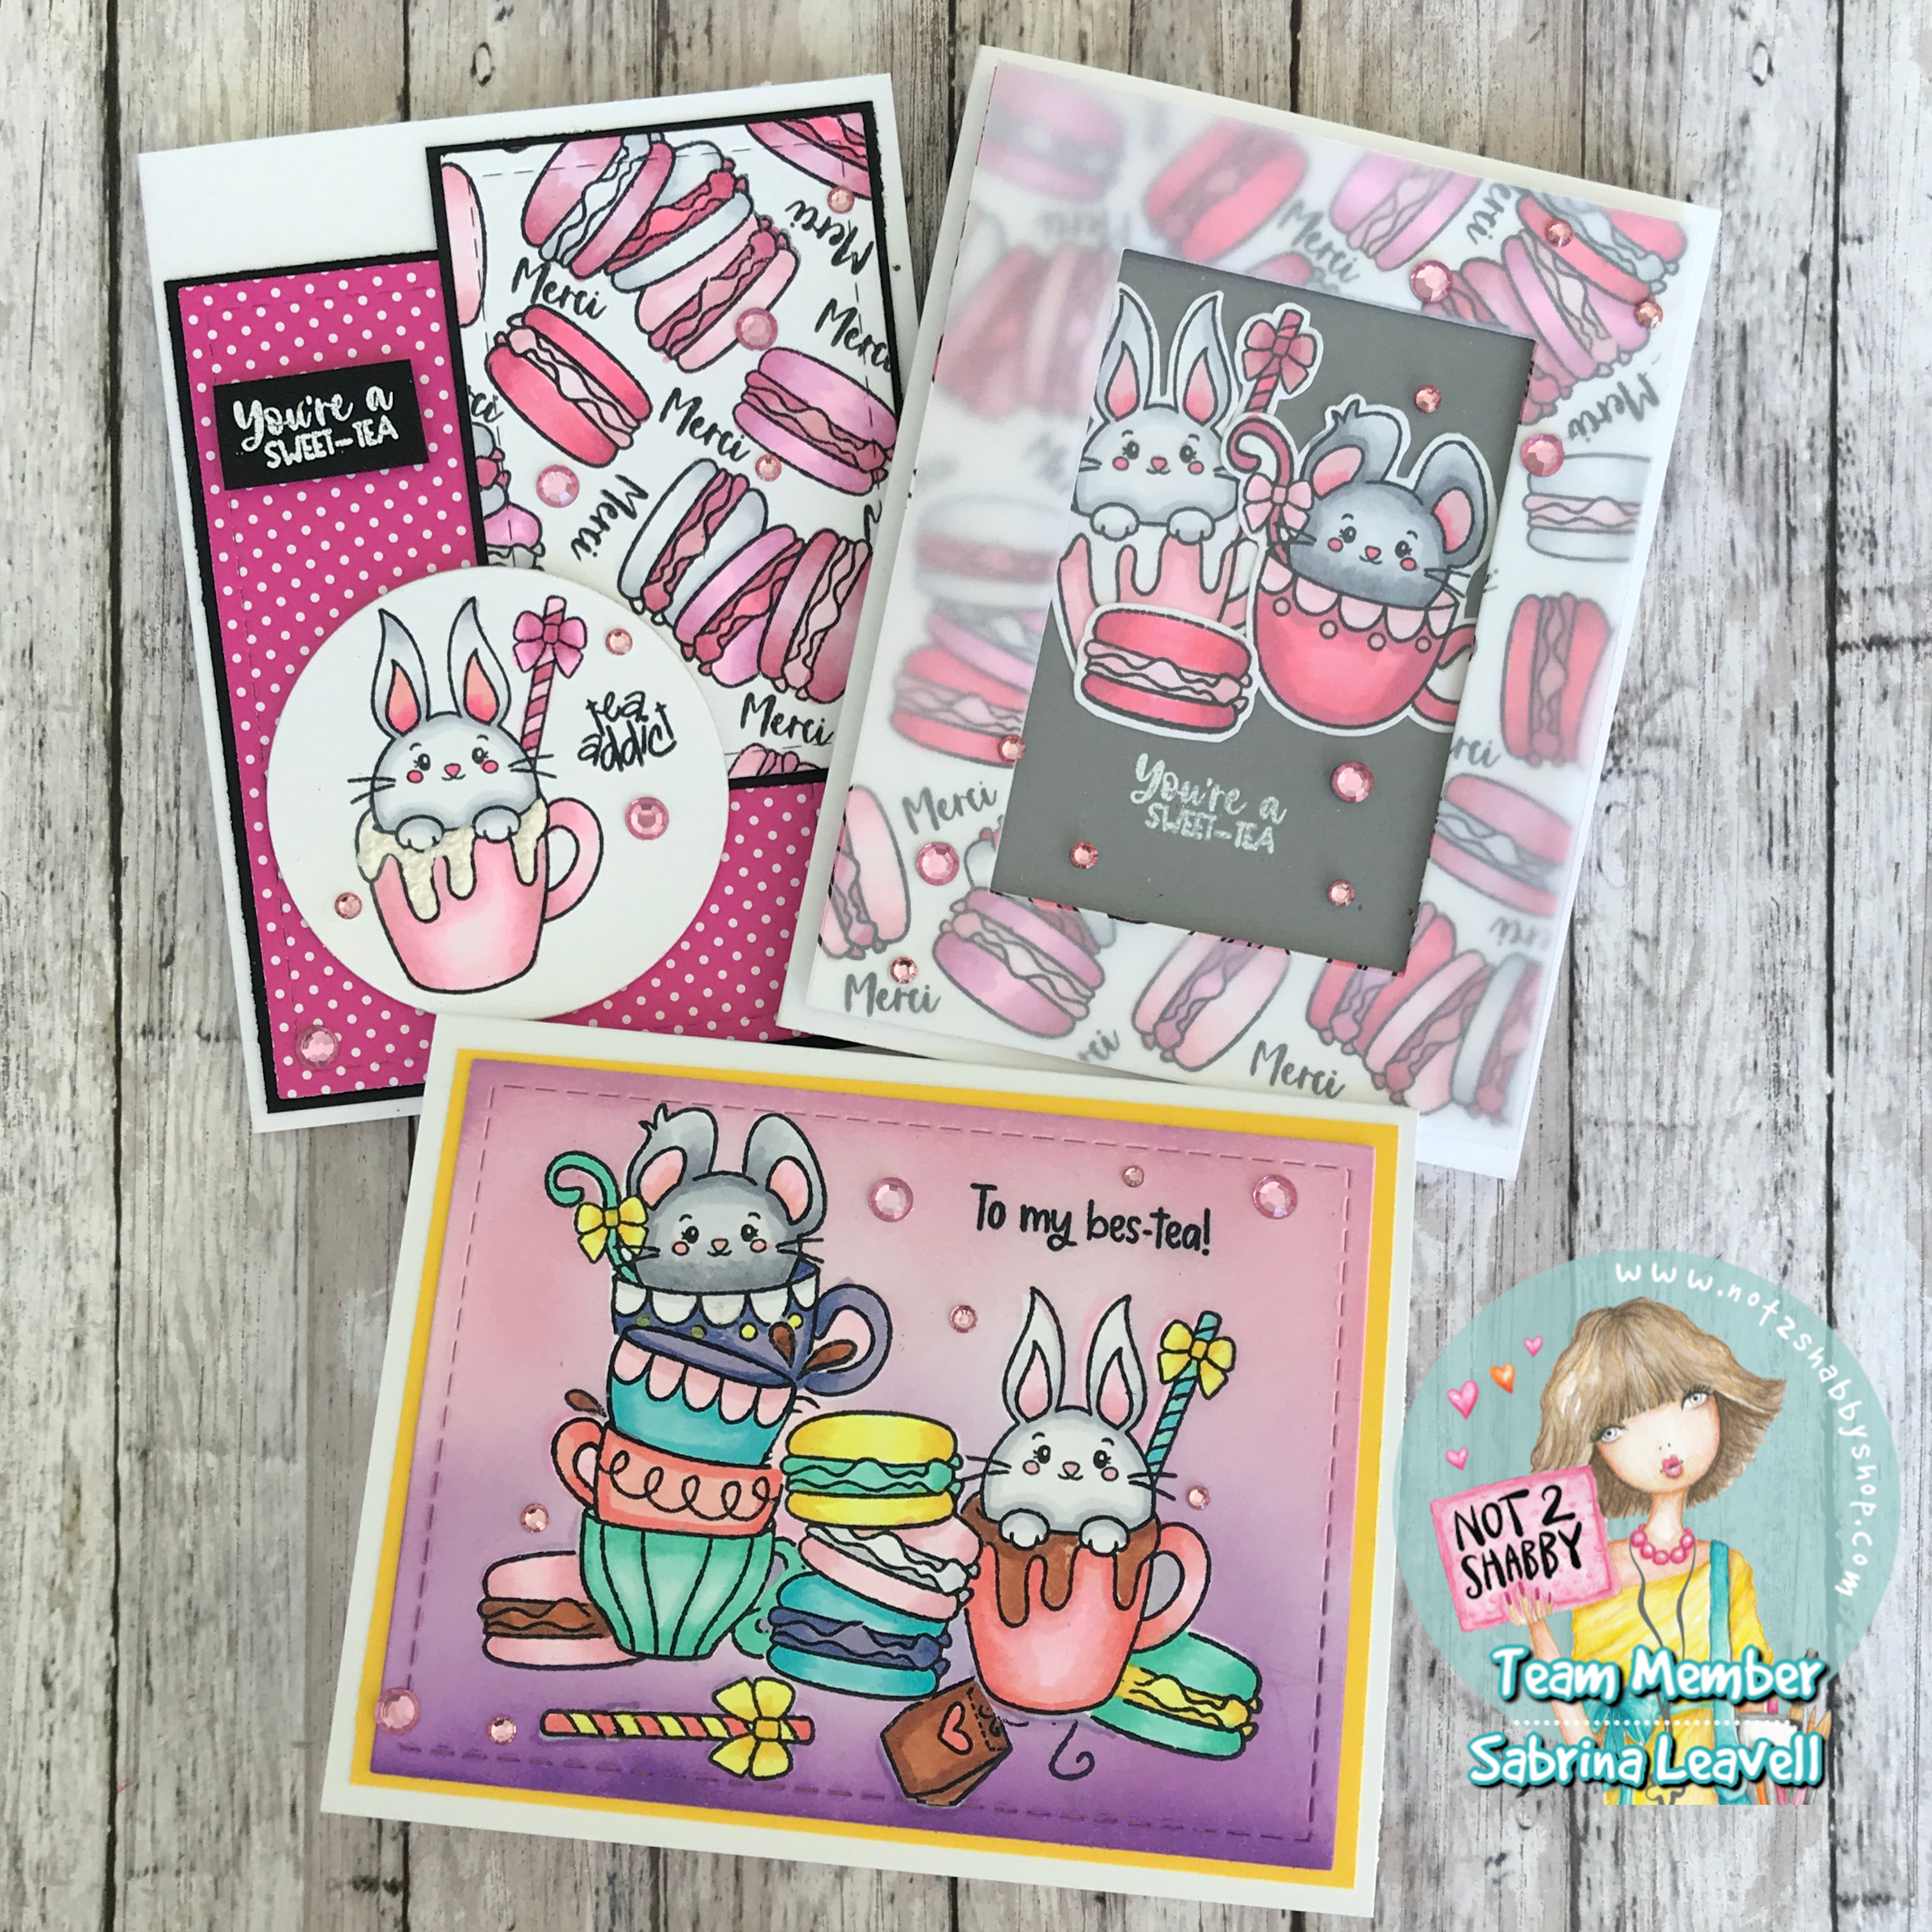
I'm excited to showcase three cards that I made using new Not 2 Shabby stamp set called "Tea Time". This stamp set is one of four new Spring and Summer themed stamp sets. Tea Time was my personal favorite, I love that you can use it for Easter, Mother's Day, Spring and Birthday! It has a cute Parisian theme to it with adorable macaroons and tea cup images. I colored all of the stamped images using my copic markers. All of them are super girly, and really represent my style of card making to a tea! See what I did there haha!
Card One

I started card one off by creating the macaroon frame. I cut a sheet of 110 lb white Nina card-stock to 4 x 5.25 in. Then I created a macaroon background on the panel using the two macaroon images from the stamp set. I made the background by stamping them from one corner to the opposite corner. I made sure to flip my acrylic block to have the macaroons floating in different directions. To fill in the blank areas, I stamped the "merci" sentiment stamp. I decided to color in all of my macaroons with different shades of pink copic markers. I added a few white macaroons to help break up all the pink ones. Once my panel was completely colored in, I die cut a small stitched rectangle from the center of the panel to create a wide frame. I colored and fussy cut the macaroon, bunny and mouse image from the stamp set and adhered them onto a grey panel cut to 3.75 x 5 in. Below the fussy cut images, I white heat embossed the sentiment "you're a sweet-tea". It was at this point that I felt my frame was too busy. To mute it slightly, I added a vellum frame on top. In order to glue the vellum I added a few pink gems on top. I then added glue behind the gems on the vellum to hide the glue spots. I also added acetate behind the macaroon frame. To add dimension, I added some foam tape behind the frame and popped it over the gray panel. On top of the acetate, I added a few more pink gems.
Card Two

It wouldn't be a one layer card for me if I didn't make at least one mistake. Can you spot it? I created this adorable scene using masks. All I can say is you want to stamp the images you want on the foreground first. In the case of this scene, I stamped out my stacked macaroons first. I then masked them and stamped the bunny and stack of tea cups. The mistake that I made was that I stamped the stack of tea cups first. I should have stamped the mouse first and then the teacups below the mouse. I camouflaged the mistake as much as I could with my coloring. I masked the bunny and tea cups to stamp the single macaroons behind them. To complete the scene, I stamped a tea bag and straw in the front. I masked all of the images and then ink blended a gradient background using wilted violet and spun sugar. I matted the panel onto a yellow rectangle and embellished the card with a few pink gems.
Card Three


Above, is a picture of the card sketch I used for card three. It's obviously just inspired by the sketch. I moved around some things and changed up the measurements. The reason I chose to use a card sketch is because I really wanted to showcase the rest of that adorable macaroon pattern paper I created for card one. To help it stand out I matte it onto some black card-stock. I'll be honest, I completely forgot the measurements that I used. Remember, I die cut that rectangle from card 1. You can apply this sketch to any size card panels you have. They won't all look the same, but they will be the same overall design. For the hot pink polka dot panel, I again, eye balled the measurements, making the panel slightly larger than the macaroon panel. I too matted the polka dot paper onto black card-stock. Whenever I work with pattern paper, I always tend to use mattes. It adds more interest to an otherwise simple card design. For my focal point, I decided to stamp and color another teacup bunny. Next to it I stamped the sentiment "tea addict". To make it look like whipped cream spewing out of the tea cup, I added a snow marker to the liquid portions on the teacup. When you heat set the snow marker it puffs up and creates some awesome puffy dimension. I popped up my circle with foam tape along with my white heat embossed sentiment which I stamped on black card-stock. I love this design and was super happy to use up that awesome macaroon paper!
Video
Supplies
NOTE: I am using affiliate links for the products listed below. If you decide to use these links, know that I will receive a small commission off of your purchase. This is no added cost to you as the consumer, it's just a way for us crafty friends to support one another!
For those of you that must have it all Jamie has a special discounted bundle!! Enjoy 10% off your purchase with code: N2S10 (Some exclusions apply.)
Not 2 Shabby New Release Bundle
Not 2 Shabby "Tea Time Buddies" stamp set
Card One
Die-namics A2 Rectangle STAX set 2
Hero Arts "PW110 White" embossing powder
Card Two
Tim Holtz "Wilted Violet" distress ink
Tim Holtz "Spun Sugar" distress ink
Card Three
Marvy "Snow Marker" white puff paint
Sunny Studio "Dots and Stripes Pastels" paper pad (ALTERNATIVE)
Hero Arts "PW110 White" embossing powder
Embellishments on all cards
1440 Round 3 mm "Light Rose Pink" flat back rhinestones
144 Round 7 mm "Light Rose Pink" flat back rhinestones